


Table of Contents (6 sections)
The Photo Is a Conversation Starter, Not a Carbon Copy
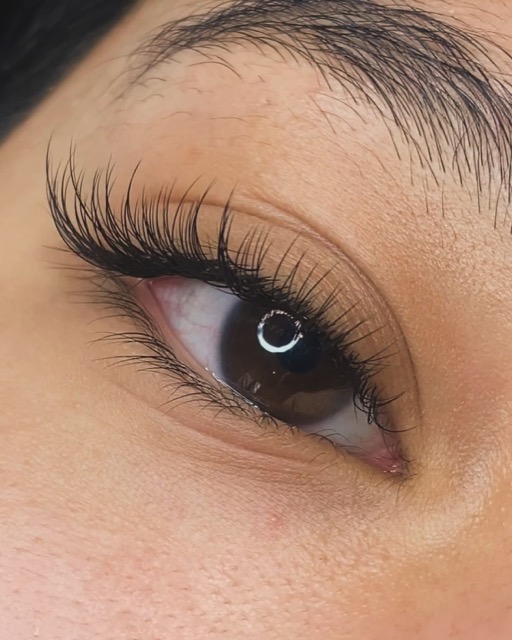
Bringing a photo and asking for 'exactly this' is completely understandable. But on a smartphone screen, you only see a finished set photographed from one flattering angle, often with professional ring lighting, edited skin, and heavy eye makeup. You cannot see how many natural lashes that model has, what lengths were selected, or how the set holds up after three days of sleeping.
Community discussions regarding 'what I asked for versus what I got' often highlight the same misunderstanding: a dramatic cat eye that looked sultry on a deep-set almond eye can make hooded or downturned eyes look tired and heavy. A photo is not a rigid template; it is a creative starting point for a conversation.
Step 1: Identify Exactly What You Like About the Image
Instead of presenting the picture as an all-or-nothing request, point out two or three specific features that catch your eye. For instance: 'I love how airy and spiky the tips look,' 'The inner corners look clean and short,' or 'I love the curl, but the lash line is darker than I would wear.' This allows your artist to preserve the elements you love while customizing the rest.
| What You See in the Photo | Professional Terminology | Details to Clarify for Your Eyes |
|---|---|---|
| Individual longer spikes rising above the lash line | Wispy texture or accent spikes | Desired spacing, height, and sharpness of spikes |
| A dense, bundled, glossy line | Wet look or un-fanned volume | Whether you want a soft, fine outline or dark definition |
| Length stretching outward to the edges | Cat eye mapping | Where the longest peak should sit relative to your eyelid shape |
| A wide, rounded, awake eye appearance | Doll eye or centered apex | Whether that curvature suits your specific eyelid fold |
Step 2: Assessing Your Own Natural Foundation
Flawless mapping unifies eye shape, natural growth direction, eyelid anatomy, curl selection, and weight distribution. Professional curricula emphasize that no single map works for every client.
- How dense are your natural lashes, and do you have natural gaps?
- Do your lashes grow straight, downward, or crisscrossed?
- Does an upper eyelid hood partially cover your lash line?
- Would the desired length brush against glasses or brow bones?
- Are you currently recovering from lash shedding or experiencing baby hair regrowth?
Step 3: Creating a Realistic Plan with Clear Priorities
You do not need to abandon an inspiration look simply because your eye shape differs from the model's. In almost every case, your artist can preserve the core priority: the feathery texture, the wide-awake lift, or the subtle daytime finish, while tailoring length and curl.
If the Photo Shows Dramatic Outer Lengths
Your lash artist can shift the apex slightly inward, taper the outer corners shorter, or use a stronger lift curl rather than excessive millimeter length to avoid dragging down the eye.
If the Model Has Twice as Many Natural Lashes
Your artist can capture the same textured rhythm with lighter, more spaced-out fans. A follow-up refill can assess whether your natural lashes carry additional fullness comfortably.
If You Are Torn Between Two Different Styles
Bring both images and explain which element you love in each. That prevents trying to merge two conflicting geometric mappings onto one set of eyes.
Step 4: Checking the Result Beyond the Front-Facing Mirror
At the end of your appointment, review your lashes with eyes open, closed, and turned slightly in profile. A set can look great from the front, but spikes that poke or an outer corner that droops will quickly become uncomfortable.
- Does the lash line feel completely weightless, with no pinching or pulling?
- Are the inner corners comfortably short and clear of the tear duct?
- Does the overall density match the agreed daytime or weekend look?
- Do you understand what can be adjusted at your first infill?
What to Send Your Lash Artist Before Your Appointment
How many inspiration pictures should I bring?
Two or three clear images are ideal. Include a short note with each picture stating what you like or dislike about the look.
Does my lash artist need a photo with eyes closed?
A closed-eye photo helps identify layering and spike placement, while an open-eye photo shows the overall silhouette. Both provide visual direction rather than an exact technical map.
Can I adjust the style at my refill appointment?
Refinements to density, length, and texture are straightforward. A complete shape change, like moving from doll eye to cat eye, often takes two appointments or a fresh set.
What if the finished set looks different from my photo?
Compare the agreed design features rather than expecting an exact match. If length, shape, or density clearly deviate from your consultation, contact your studio promptly with photos.
Updated: August 2026. The cover image features authentic studio work from Sarah Krasnic's portfolio in Graz.
Sources and notes (3)
All facts and recommendations were verified using official guidelines and scientific sources.